Blog

  • Microgreens Rack Setup Guide

    Microgreens Rack Setup Guide

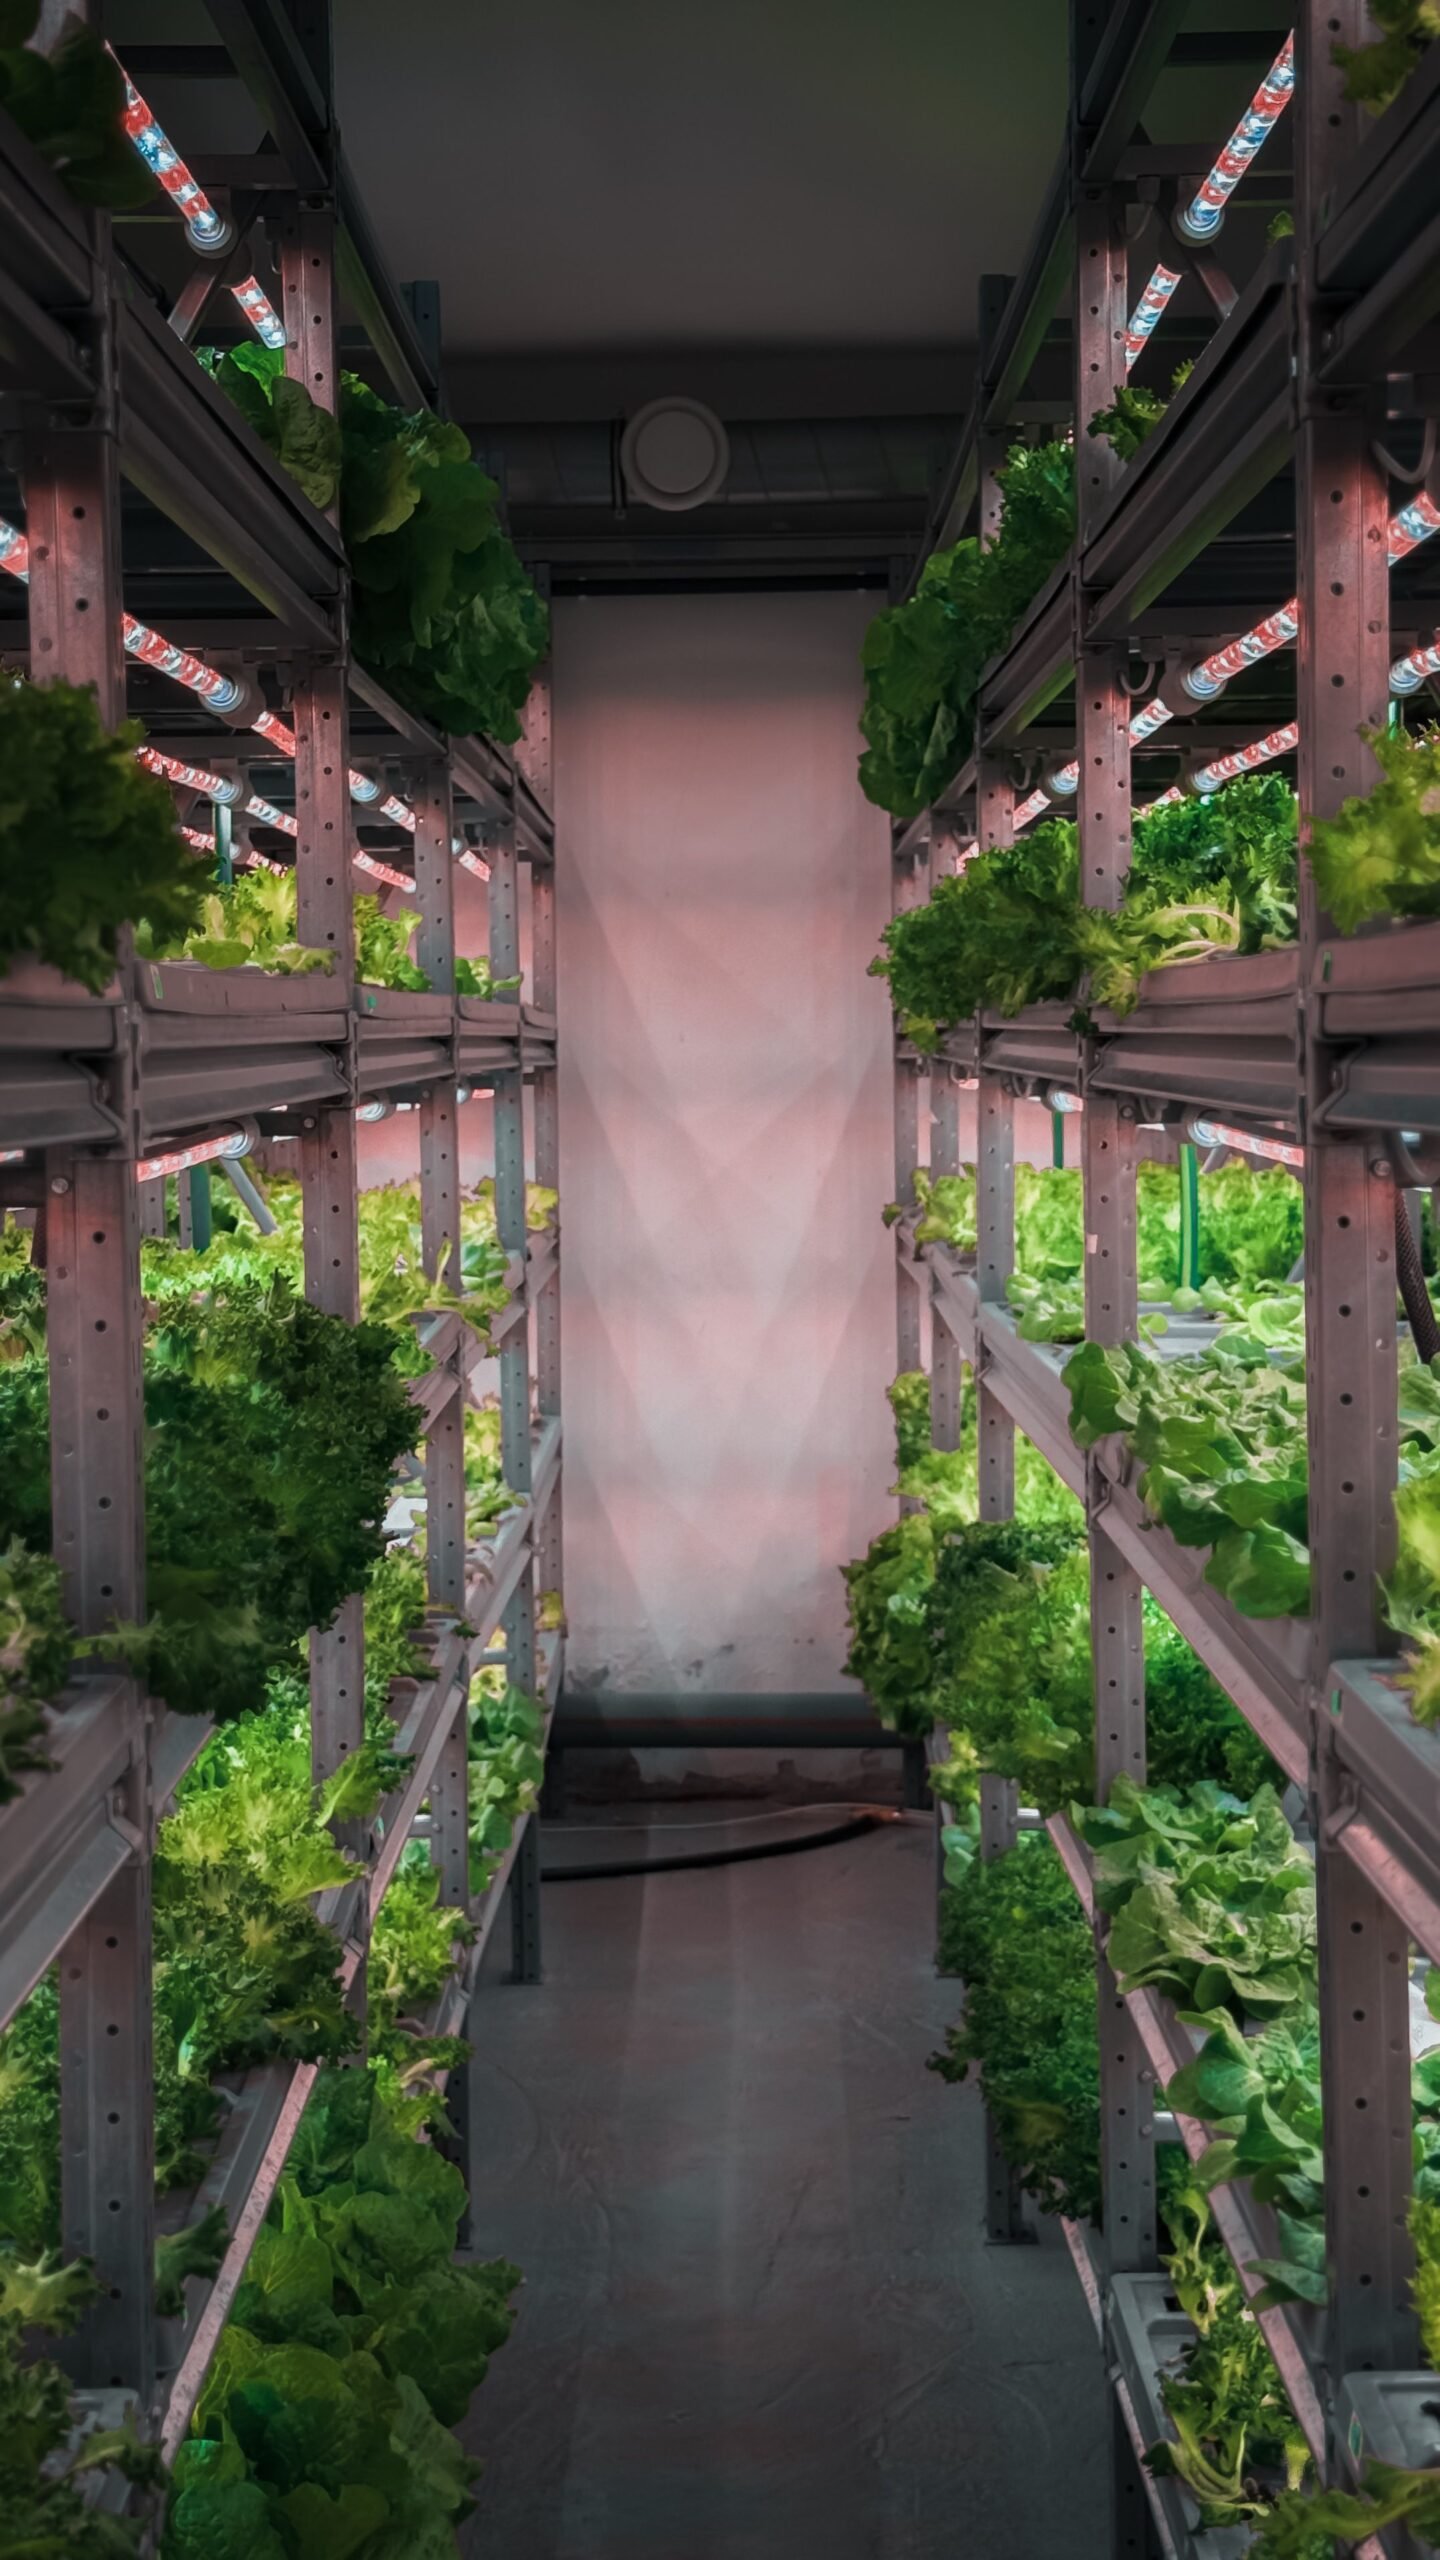
    A rack can make microgreens much easier to manage—but only if it is designed around the work you actually do. Capacity matters less than whether you can water, move, inspect and harvest every tray comfortably.

    Start with tray access

    Decide how many trays you want under light at the same time, then leave enough vertical clearance to lift trays, bottom-water and work without removing half the shelf.

    Wire shelving is popular for a reason

    Recent grower discussions repeatedly favor adjustable wire shelving because lights and fans can be attached easily and airflow is not blocked by solid shelf surfaces. All-in-one kits can work, but modular racks are easier to adapt when your process changes.

    Plan light coverage shelf by shelf

    Do not assume one fixture in the center will cover every tray evenly. Community growers often add a second bar on wider shelves when seedlings lean toward the center.

    Power and timers

    Multiple lights and fans should be planned as one electrical system. Use appropriately rated timers, power strips and outlets, keep connections away from water and avoid improvised wiring in wet areas.

    Airflow and room humidity

    Small fans can keep air moving around each shelf, but more trays also add moisture to the room. As you scale, monitor the room rather than assuming rack-level fans solve humidity by themselves.

    Leave room for germination

    You may need more trays than the number sitting under lights because some crops are germinating under cover while others are in the lit growth stage. Keep that workflow in mind when buying tray counts.

    Future comparison slot: 2-foot compact racks, 4-foot wire racks, light bars, timers and shelf fans can later be compared here as complete setup bundles.

    Sources: University of Maryland Extension; recent r/microgreens rack/setup discussions.
  • Microgreens Fans and Airflow Guide

    Microgreens Fans and Airflow Guide

    Dense microgreen canopies hold moisture. Airflow helps prevent the growing area from staying stagnant, but more fan power is not automatically better.

    The goal is circulation, not wind

    University of Maryland Extension recommends good air circulation and describes a gentle breeze from a nearby fan as useful for discouraging plant disease.

    What to look for in a fan

    FactorWhy it matters
    AdjustabilityYou want enough movement to exchange air without flattening seedlings.
    MountingClip-on or compact fans can fit shelves without consuming tray space.
    NoiseHome growers may run fans for long periods in living spaces.
    PowerSeveral rack fans add another continuous load to the system.
    DirectionAir should circulate around the canopy rather than dry one tray edge all day.

    When room humidity matters

    As tray count increases, the growing area can release more moisture. A fan moves air but does not remove water from it. If room humidity remains high, environmental control may become a separate problem from airflow.

    Future comparison slot: Compact home fan, clip-on rack fan and higher-capacity grow-room fan recommendations can be added here later.

    Source: University of Maryland Extension; grower community setup discussions.

  • Best Growing Medium for Microgreens: Soil vs Coco vs Mats

    Best Growing Medium for Microgreens: Soil vs Coco vs Mats

    Growing medium changes how a tray holds water, how often you need to irrigate, how clean the harvest is and how much recurring material you buy. There is no single medium that wins every use case.

    Soilless potting mix

    Peat-based or other light soilless mixes are common because they buffer moisture well and are easy for beginners to understand. Penn State Extension uses peat/perlite mix in its home-growing example and emphasizes choosing media that are clean, safe, sustainable and reasonably priced.

    Coconut coir

    Coco is popular because it is lightweight and relatively clean to handle. Water behavior depends on the specific product and how it is prepared, so learn the moisture pattern of the material rather than treating all coir as identical.

    Growing mats

    University of Maryland lists single-use mats made from hemp, wood fiber, coconut coir, bamboo or jute, and Penn State notes that mats can produce a cleaner harvested crop than potting soil. Mats trade less mess for a recurring consumable cost.

    MediumStrengthTradeoff
    Soilless mixForgiving moisture buffer and familiar workflow.Messier harvest area and more cleanup.
    Coco coirLightweight and tidy.Water behavior varies by product and preparation.
    Fiber matCleaner crop and simple handling.Recurring cost and crop compatibility matter.
    Future comparison slot: Soil mixes, coir bricks and natural-fiber mats can later be compared here by cost per tray and use case.

    Sources: Penn State Extension; University of Maryland Extension.

  • Microgreens Grow Lights Buying Guide

    Microgreens Grow Lights Buying Guide

    Microgreens do not need the same lighting intensity as fruiting indoor crops, so buying the most powerful fixture can be unnecessary. The key is even, repeatable coverage across the tray and a fixture that fits the shelf.

    Coverage comes before wattage

    University of Maryland Extension notes that fluorescent or LED grow lights can supplement or replace sunlight and uses about 16 hours of total daily light as a practical reference. They also note that fixture distance depends on intensity, with 6–12 inches above foliage as a typical range.

    FactorWhat to ask
    CoverageDoes the light illuminate the full tray evenly, including corners and edges?
    Fixture shapeDoes a bar, shop-light or panel shape match the shelf geometry?
    MountingCan the fixture be raised, lowered and secured safely?
    HeatWill the fixture add unwanted heat to a compact shelf or room?
    PowerHow does one shelf scale into several shelves running daily?
    TimerCan the light run reliably on a timer or smart plug?

    One light or more than one?

    Grower discussions frequently report that one centered fixture can create uneven growth or leaning on wider shelves, while two bars can improve coverage. The correct answer depends on shelf width and the fixture’s actual spread.

    Start with the shelf, then choose the fixture

    Measure the usable shelf width and height first. A light is only “good” if it fits the rack, gives the canopy even coverage and leaves enough room to work with trays.

    Future comparison slot: We can later add “best compact,” “best 2-foot shelf,” and “best 4-foot rack” recommendations here.

    Source: University of Maryland Extension; recent r/microgreens setup discussions.

  • Microgreen Trays Buying Guide: What Actually Matters

    Microgreen Trays Buying Guide: What Actually Matters

    Microgreen trays look simple, but small design differences affect watering, cleanup, durability and how easy the crop is to harvest. The best tray is the one that fits your workflow—not necessarily the most expensive one.

    Start with the tray pair

    A common system uses one shallow tray with drainage holes nested inside a solid tray that acts as the water reservoir. University of Maryland Extension describes this same two-tray arrangement for commercial microgreen trays.

    What to compare

    FactorWhy it matters
    DepthShallower trays make cutting easier; deeper trays can hold more medium and feel sturdier.
    DrainageHole pattern influences how evenly water moves through the tray when bottom watering.
    RigidityThin trays can flex when wet or loaded with media, making them harder to carry.
    NestingGood fit makes bottom watering easier without the trays binding together.
    CleaningSimple corners and channels are easier to scrub and rinse between crops.
    LongevityA reusable tray can justify a higher initial price if it survives many more cycles.

    When cheap trays are enough

    If you are learning with one or two trays, inexpensive food-safe containers or greenhouse flats can work. Extension guidance explicitly notes that standard greenhouse flats and food containers are viable options.

    When sturdier trays make sense

    Durability becomes more important when trays are carried full of wet media, moved on and off racks frequently, or cleaned repeatedly. At that point, rigidity and lifespan matter more than saving a few dollars on the first purchase.

    Future comparison slot: This page is ready for beginner-budget, durable-home and rack-scale tray recommendations once affiliate accounts are connected.

    Source: University of Maryland Extension, “Growing Microgreens and Baby Greens Indoors.”

  • How to Grow Mustard Microgreens

    How to Grow Mustard Microgreens

    Mustard is a fast brassica microgreen with a sharper flavor than many beginner crops. It is useful for growers who already understand the basic tray workflow and want something that adds more punch to mixes and meals.

    Sow mustard like a small-seeded brassica

    Use a shallow tray with evenly moist soilless media. Broadcast seed evenly, press it into contact with the surface and avoid heavy piles that create wet pockets.

    Fast germination means frequent checks

    Mustard belongs to the cabbage family. Extension guidance describes brassicas as fast-germinating and short-cycle microgreens, so the tray can change quickly during early growth.

    Move into light before stems stretch too far

    A short dark period may be used to encourage stem length, but do not allow the crop to become weak and excessively elongated. Move into even light and monitor how the canopy responds.

    Water and airflow

    Use bottom watering after roots are established and maintain gentle circulation around the canopy. Because the crop is dense, small differences in moisture can show up quickly.

    Harvest for flavor as well as appearance

    Mustard’s appeal is its bold flavor. Harvest at a stage where the texture is still tender and the crop has developed the flavor intensity you want.

    Next: try radish for another peppery fast crop.

    Source references: University of Maryland Extension, “Growing Microgreens and Baby Greens Indoors”; Penn State Extension, “The ABCs of Microgreens.”

  • How to Grow Red Cabbage Microgreens

    How to Grow Red Cabbage Microgreens

    Red cabbage is a fast brassica that adds color to the tray while keeping a familiar beginner-friendly growing workflow. It is a good crop for learning how light influences canopy color and how even sowing affects presentation.

    Use the standard small-seed brassica workflow

    Prepare shallow, evenly moist growing media, broadcast seed uniformly and press it into contact with the surface. Avoid dense clumps that hold too much moisture.

    Germination

    Cover during germination and check frequently because cabbage-family crops can germinate rapidly under warm indoor conditions. Keep the medium moist rather than saturated.

    Light brings out the crop

    Move the tray into useful light before seedlings become excessively stretched. Even light helps the canopy develop more uniformly and makes the crop’s color contrast more noticeable.

    Water from below once roots establish

    Bottom watering is useful once roots can wick moisture through the tray. Check the corners and edges as well as the center so dry zones do not develop unnoticed.

    Harvest

    Harvest when cotyledons are open and early true leaves are emerging. Penn State Extension describes brassicas as among the shortest-cycle microgreens, while overall harvest timing still varies with conditions and the stage you prefer.

    Next: compare red cabbage with broccoli or mustard.

    Source references: University of Maryland Extension, “Growing Microgreens and Baby Greens Indoors”; Penn State Extension, “The ABCs of Microgreens.”

  • How to Grow Pea Shoots

    How to Grow Pea Shoots

    Pea shoots are a useful step beyond small-seeded microgreens. The seed is large, the root system is strong, and the crop develops a substantial canopy that behaves differently from broccoli or radish.

    Soak peas before sowing

    University of Maryland Extension lists pea among seeds that benefit from soaking for roughly 6 to 12 hours before sowing. Soaking helps hydrate the large seed before it enters the tray.

    Give large seeds good contact

    Spread soaked seed across an even growing surface and press it into reliable contact with the medium. Large seed takes more physical space than brassica seed, so uniform distribution is especially important.

    Germination

    Use a cover or weighted tray as appropriate to hold moisture and encourage rooting. Check the tray regularly so the germination environment stays moist without becoming stagnant.

    Light and airflow

    Move into light when the crop has established. Pea shoots can create a thick canopy, so air movement becomes increasingly important as leaves and tendrils fill the tray.

    Watering

    Once roots are established, bottom watering helps move moisture through the tray without repeatedly wetting the foliage. Use the weight and feel of the tray to learn its actual demand.

    Harvest

    Harvest when the shoots reach the texture and height you prefer. Because pea shoots are a larger crop, the ideal harvest can be influenced by whether you want tender young shoots or a more substantial bite.

    Next: see sunflower microgreens for another large-seeded workflow.

    Source reference: University of Maryland Extension, “Growing Microgreens and Baby Greens Indoors.”

  • How to Grow Sunflower Microgreens

    How to Grow Sunflower Microgreens

    Sunflower microgreens are very different from tiny-seeded brassicas. The seed is large, the canopy is substantial, and learning sunflower gives you experience with soaking, heavier seed density and stubborn seed hulls.

    Soak the seed first

    University of Maryland Extension lists sunflower among the seeds that benefit from soaking before sowing. Their guidance gives a general soaking range of 6 to 12 hours for seeds such as sunflower and pea.

    Use enough moisture without waterlogging

    Large seeds need reliable moisture during germination, but the tray still needs drainage and air. Keep the medium evenly moist and avoid leaving standing water around the root zone.

    Pressure and germination

    Many growers use a cover or weighted tray during sunflower germination to improve seed-to-medium contact and encourage strong rooting. Check progress regularly; the goal is a vigorous rooted mat, not a compressed, overly wet tray.

    Managing seed hulls

    Sunflower hulls often remain attached as seedlings emerge. Maintaining appropriate humidity during germination can help hulls release, and gentle handling after emergence can remove loose hulls without damaging the crop.

    Light and harvest

    Once the crop moves into light, watch for an even green canopy and sturdy stems. Harvest when the leaves and texture fit your preference rather than relying only on a day count.

    Common sunflower problems

    • Uneven germination from inconsistent soaking or moisture.
    • Hull retention when the germination environment dries too quickly.
    • Wet pockets where large seeds are crowded.
    • Weak stems from delayed or uneven light.

    Next: compare sunflower with pea shoots, another large-seeded crop with a strong canopy.

    Source reference: University of Maryland Extension, “Growing Microgreens and Baby Greens Indoors.”

  • How to Grow Radish Microgreens

    How to Grow Radish Microgreens

    Radish is a fast, vigorous microgreen with a peppery flavor and an easy-to-read canopy. It is especially useful for beginners because mistakes in moisture, light or sowing density show up quickly.

    Why radish is beginner-friendly

    Radish is part of the brassica family. Penn State Extension identifies brassicas as some of the shortest-cycle microgreens, and radish is widely used as a fast benchmark crop.

    Sow evenly

    Prepare a level, evenly moist growing surface and distribute seed across the tray without heavy piles. Good seed-to-medium contact helps the tray germinate more uniformly.

    Germination and blackout

    Cover during germination to hold moisture. Some growers use a short blackout after emergence to increase stem length, but treat blackout as a technique rather than a mandatory step. Move into light before seedlings become excessively stretched.

    Light, water and airflow

    • Give the canopy reasonably even light.
    • Use bottom watering once roots are well established.
    • Keep the medium moist, not saturated.
    • Maintain gentle circulation around the dense canopy.

    Harvest

    Cut above the growing medium with clean, sharp tools when the crop reaches the stage and texture you want. A young, vigorous radish tray can move from germination to harvest quickly compared with slower herbs.

    What radish teaches you

    Radish is useful for learning how even sowing affects canopy uniformity, how light changes stem shape, and how quickly a dense tray can shift from moist to too wet.

    Next: try broccoli for a milder fast brassica, or mustard for an even bolder flavor.

    Source references: University of Maryland Extension, “Growing Microgreens and Baby Greens Indoors”; Penn State Extension, “The ABCs of Microgreens.”